Thursday, September 23, 2010

Installing lights and carbon rod in fuse

I use the Turnigy R/C LED lightingsystem which is found here.

The yellow thing is the controller board for the nav lights. I've installed the two MPX plugs for the right side fuse. One plug is for the lights and the other is for servos.

Red flashing nav light in front.


MPX plug on the outside.

Installed the carbon rod in the boom.

I've positioned the vertical fin where it's supposed to be. The flashing red nav light is on top of the fin. The wires go through the carbon rod.

Monday, September 20, 2010

Camera pan/tilt

For as cheap as $3,99 I couldn't resist buying the pan/tilt camera mount from Hobbyking. It's a small, light weight mount that's supposed to mount on HXT900 servos or similar. Just add some CA glue and it's put together in 5 minutes.

Thursday, September 9, 2010

Flaps mod

I know there are many different ideas on how to mod the EZ* the best way, but I really think I need the extra lift and speed reduction on the landings. So, I decided to make flaps. They are quite large and will be operated by a Hitec HS-55.

On the picture above I marked where to cut.


Done the cutting. I also marked where the servo wire will go. As you can see, I added a carbon strip just above the aileron servo in this picture. I'm certain I need that extra stability where the carbon rod in the wing doesn't reach.

I changed my mind regarding the servo wire. A shorter way must be a better way...

Thursday, June 10, 2010

Landing lights in wings

The Turnigy High Density LED strips are perfectly suited for landing lights. You get one meter in the box and you can cut them every three lights.
I use 6 LEDs in each wing. They run on 12v which is great since I'm using a 3S LiPo in the plane.
I glued the foam back that I cut away to fit the lights. Now afterwards I don't think it looks that good. I'll come up with another plan in the future.
Soldering the 6 wires (2 nav light, 2 white strobe, 2 landing LED) to the MPX plug for easy attachment of the wings.
Shrink tubed and done.

Tuesday, June 8, 2010

Navigation lights in wings


I bought the Turnigy LED navigation lights. They have the correct number of LEDs and colors: one green (nav, right wing), one red (nav, left wing), two white strobes (wings, facing backwards), two flashing red (top of vertical fin, bottom of fuselage in front). The lights are controlled by a little PCB which is really light.

They connect to any free channel and are always on. In the kit is also two white landing lights, but since I'm going to use LED strips for that which are much more bright, I didn't use them.


I used hot glue to secure the LEDs. Unfortunately i had to redo this since the light wasn't that visible from the front. Now both lights are on the wing tip.

I'm using my metal ruler when i do the trenches for the cables. After cutting the trench with the knife, I use tweezers to peel the foam away.

There you go, fitted and ready.

Monday, June 7, 2010

Converting EZG wings

There are many different ways of modding the EZG wings (Multiplex #224159) but I used my cheap hobby knife. First I made marks on the wings where I'd cut and then just "shaved" the excess material off. Now the fit perfectly. After that I glued a 10 mm carbon fibre rod in the wing for stability.

Gyros for that extra stability

Me and Simon ordered 2 gyros each of the E-sky EK2-0704. They work really well and are cheap. Search for them on eBay and you'll probably get them for $0,99 each + $7 shipping.

Saturday, May 22, 2010

Parkfun Fusion - First FPV test - Nokia 6120c

Yey, my first FPV test. Taped the Nokia 6120c on top of the plane at the COG.


The phone weighs 90g.


Flew well without any problems, so it's time to upgrade the camera to the next level!

Wednesday, May 19, 2010

Parkfun Fusion - Broke my nose off

Well, after glueing it all back together and flying successfully for a few days, I got cocky and started showing my wife how nicely it hovered in the strong headwind....until the headwind died...

I glued it back on again with even more Epoxy, and added three carbon strips for extra strength.

Thursday, May 13, 2010

New stuff arrived

Today I recieved a new box from ElectronicaRC. I must say, they are actually quite fast.

In the box i found the LCD screen for my ground station.

It's really slick and intended for mounting on a wall or similar which suits me fine.


Very thin which means that it won't take up much space.


Also in the box was the two microsensors from EagleTree for the OSD Pro - altimeter and airspeed indicator.


Very small and light. A pitot tube was included in the airspeed package.


Tuesday, May 11, 2010

Repaired and airborne

After using a whole dual tube of Expoy, I have fixed my Fusion and flew it this morning.

I originally crashed because I was stupidly performing dive/climb manoeuvres that made the wings bend far too much. The whole thing nearly fell apart in mid air. On my last dive, I couldn't pull up enough, so the plane ate dirt.


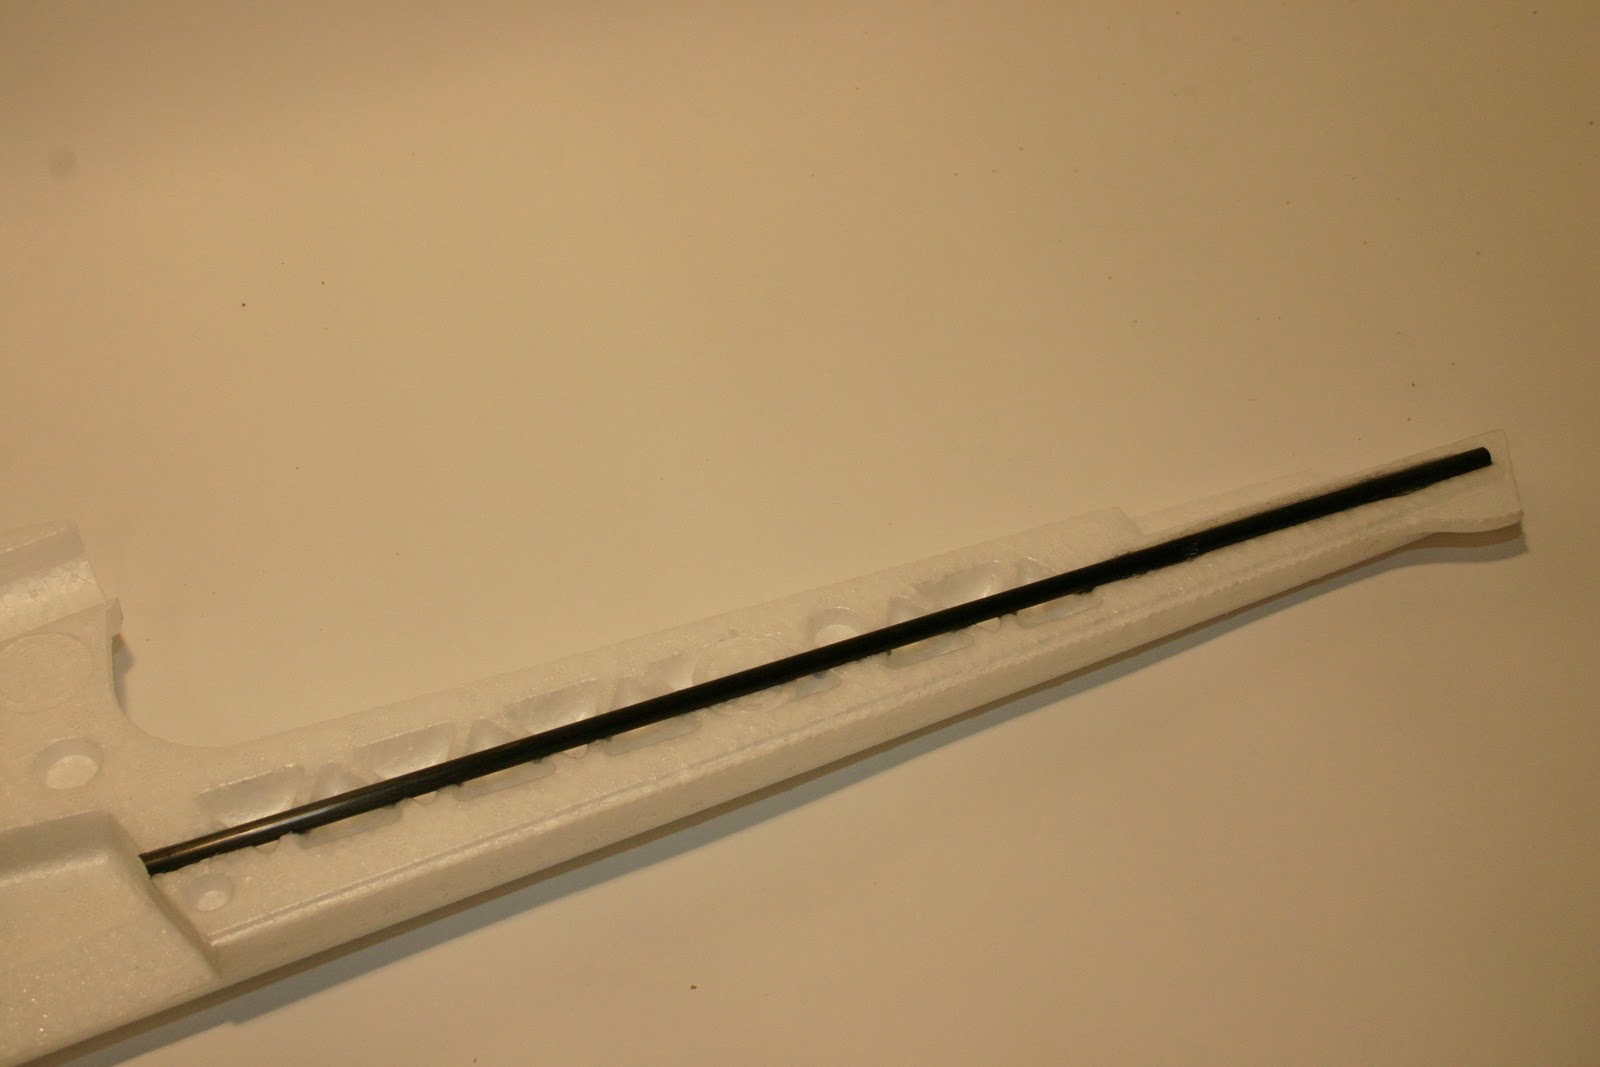
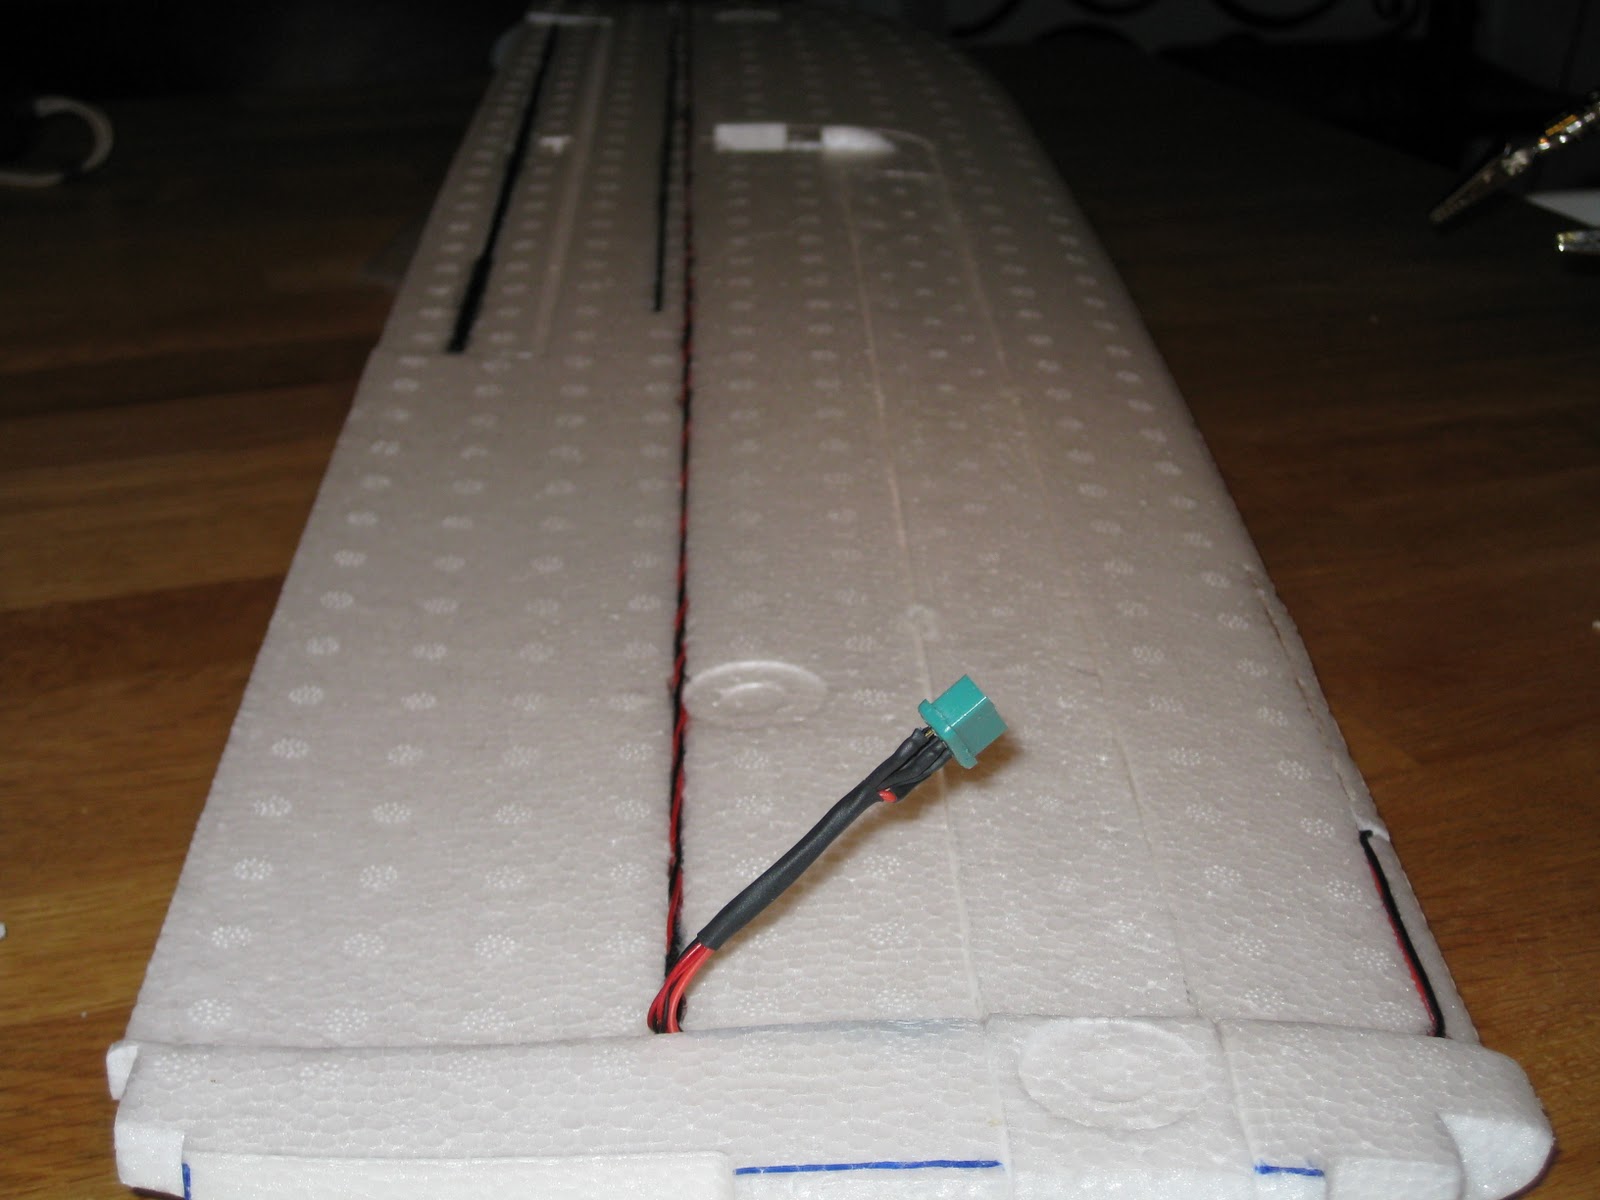
As you can see, I have added carbon strips to the wings to make them more rigid. They really made a great difference this morning.

Now it's time to test fly with 100g of weight on the front for training before I buy a camera and stick it on.

Sunday, May 9, 2010

Oops


I will be using a lot of Epoxy tomorrow!


Saturday, May 8, 2010

Whooohaaaa - goggles working

Now I've done the mod on the Trimersion goggles. Thanks aaronredbaron for great instructions. I de-soldered the gyro and soldered wires for audio and video directly on to the board. I used an old firewire cable, which did come very much in handy because it has 6 wires into 1. I've just made a test now, I'm waiting for Elfa to re-stock firewire cable (4,5m) and a female jack that I'm gonna use in the ground station.

Gyro and antenna is gone. I added some tape to get the wires out of the way.


This is the wires added to the board:
- red: power
- black: ground
- blue: common ground for audio and video
- brown: video
- green: audio right
- white: audio left

Friday, May 7, 2010

Another purchase

Ok, I've done it again. This time I needed to complete my onboard equipment and the ground station.

First up is the altimeter microsensor that connects to the eLogger. It uses barometic pressure for correct indications.

I also added the airspeed indicator which uses a pitot tube to measure airspeed. It also connects to the eLogger.

This screen seems to fit good into my ground station. I'm gonna use it for initial setup and pre-flight check when I'm at the field.

Back to school

After like 20 years of not being in school I've been "forced" to actually study again. I'm gonna take the test to get an amateur radio license which you have to have in order to operate on the 1,3GHz frequency that my video gear use.

The test is about 40 questions on electronics, ohms, watts and rules and regulations around radio etc. Since I don't have this knowledge from before (took economics in school) it's a whole new area for me. I'm not too sure I'm gonna pass, but I'll give it a shot.

If you live in Sweden and want to take the test the browse to SSA - Sveriges Sändareamatörer for more info on how to contact your local radio club.


Parkfun Fusion Brushless Motor Mod


Converted a stock (400 type motor) Parkfun Fusion into a brushless and reliable aerial photography platform. It's a 4-channel copy of the EasyStar with functional ailerons. Hope to move towards FPV if I don't have any bad accidents!

Plane: Parkfun Fusion
Servos: 4 Hitec HS-55 feather servos
Transmitter: Hitec Optic 6
Receiver: Hitec Micro 05S
Motor: HXT 2835 (380S) 2200kv Brushless Inrunner
ESC: TowerPro w25A Brushless Speed Controller
Prop: TGS Sport 6x4E Precision propeller
Prop adapter/Spinner: Alu cone 1/4-28-3.2mm
Flight battery: Turnigy 2200mAh 3S 25C Lipo Pack
Navigation lights: Turnigy R/C LED Lighting System
Magnets holding wings: Strong Rare Earth magnets (10pcs/set)

The receiver and transmitter were changed to ensure a reliable control connection.

Electronics before and after.


Prop with motor before and after.


New spinner and prop.


Had to cut off nose to remove big bastard weight. Glued back on with Component Epoxy.


First test of brushless motor

Time for test flight now. If nothing goes wrong, I'll find a camera to stick on!