Ok, as my RC-Playground buddy ordered his cute Swallow EDF jet, I thought I should join him;
It's Hobbyking's 64MM EDF T-45 Goshawk. A beautiful scale jet with recessed panel lines and extra details all over the place. I ordered the kit version and beefed up the power system for screaming speed and power to carry extra equipment such as telemetry sensors, retracts, etc.
T-45 Goshawk R/C 64mm EDF Jet EPO Kit only
EDF Ducted Fan Unit 7Blade 2.5inch 64mm
HK2836 EDF Outrunner 3800kv for 64mm
TURNIGY Plush 60amp Speed Controller
Turnigy nano-tech 2200mah 4S 45~90C Lipo Pack
Stay tuned for my build log, mods and flight tests.
:)
Thursday, June 30, 2011
Tuesday, June 28, 2011
Small EDF ordered
I recently found this cute little EDF and just had to get it. The plane is only 660 mm wingspan with a 40 mm small EDF. It requires 2 micro 2,5g servos to control the two ailerons/elevator.
Tech specs (HK info):
Wing Span: 610mm (24in)
Length: 390mm (15.3in)
Flying Weight: 140g
EDF Unit: 40mm (Required)
ESC: 15A (Required)
Servos: 2 x 2.5g (Required)
Battery: 2s 7.4v 500mAh Lipoly (Required)
Required:
EDF Unit: 40mm
ESC: 15A
Battery: 2s 7.4v 500mAh Lipoly
Servos: 2 x 2.5g
I got the EDF 40 completely assembled with a 8400 KV brushless motor, which should fit perfect. It can only handle a 2S pack, but I'll try to find another motor for better performance.
Tech specs (HK info):
Weight: 28g
Kv: 8400rpm/v
Size: 42 x 39mm
Battery: 2~3S
Voltage: 7.5, 8.0, 8.5V
Current: 13.0, 15.0, 17.5A
Thrust: 130, 150, 170g
Watt: 97.5, 120, 148.8W
Efficiency(g/W): 1.33, 1.25, 1.14
As soon as all parts arrive I'll do a build log and a test run.
Parts used
Mini Swallow Jet 40mm EDF (610mm) (KIT)
EDF40 with 8400kv Motor Assembled
HK-282A Single-Screw, Ultra-Micro Servo 2g (my servos was actually orange, not black)
TURNIGY Plush 18amp Speed Controller
Tech specs (HK info):
Wing Span: 610mm (24in)
Length: 390mm (15.3in)
Flying Weight: 140g
EDF Unit: 40mm (Required)
ESC: 15A (Required)
Servos: 2 x 2.5g (Required)
Battery: 2s 7.4v 500mAh Lipoly (Required)
Required:
EDF Unit: 40mm
ESC: 15A
Battery: 2s 7.4v 500mAh Lipoly
Servos: 2 x 2.5g
I got the EDF 40 completely assembled with a 8400 KV brushless motor, which should fit perfect. It can only handle a 2S pack, but I'll try to find another motor for better performance.
Tech specs (HK info):
Weight: 28g
Kv: 8400rpm/v
Size: 42 x 39mm
Battery: 2~3S
Voltage: 7.5, 8.0, 8.5V
Current: 13.0, 15.0, 17.5A
Thrust: 130, 150, 170g
Watt: 97.5, 120, 148.8W
Efficiency(g/W): 1.33, 1.25, 1.14
As soon as all parts arrive I'll do a build log and a test run.
Parts used
Mini Swallow Jet 40mm EDF (610mm) (KIT)
EDF40 with 8400kv Motor Assembled
HK-282A Single-Screw, Ultra-Micro Servo 2g (my servos was actually orange, not black)
TURNIGY Plush 18amp Speed Controller
Monday, March 14, 2011
Review Hobbyking TX glove and universal heater
Since we still have cold wheather the transmitter glove and universal heater from Hobbyking is a must for addicted flyers.
There is really not much to say about the glove itself. Most transmitters will fit since it is quite big.
Universal heater before unboxing.
Neatly packed.
Instructions on the bottom side of the box, no manual inside needed.
Control unit with wires and plugs.
Heat pads before installation.
Control unit after changing connectors to a T-plug instead.
Check out the short film we made on these products.
Be aware, this thing can get really hot! The range is from 30-80 degrees celsius which probably could cause serious burns. We flew in -7 degrees with 8 m/s winds and it was almost impossible to fly more than a couple of minutes not using the glove/heater combo. We power the heater with a 3S Turnigy LiPo, 1300mAh which lasts for one flight.
Products used in this review:
- Hobbyking Transmitter Glove
- Hobbyking Universal heater
- T-plug
- Turnigy 1300mAh 3S 30C Lipo Pack
Monday, March 7, 2011
High Density LED Flexible Strip Landing Lights - Parkfun Fusion
Fitted flexible strip LED lights to my wings and tail as landing/visibility lighting and also the Lumifly Lighting system as navigation lights. All from Hobbyking.
Parts we used:
Turnigy High Density R/C LED Flexible Strip-White
Lumifly Lighting system FAA Configurable
Parts we used:
Turnigy High Density R/C LED Flexible Strip-White
Lumifly Lighting system FAA Configurable
Sunday, March 6, 2011
Product test - HXT9610 Metal gear retract servo
We recently installed the HXT9610 Metal gear retract servo from Hobbyking in our Kyosho Focke Wulf FW-190. It runs really smooth and works great. Check out the short clip.
We will post a full review later this spring.
Parts we used:
Hobbyking HXT9610 Low profile metal gear retract servo
Kyosho SQS Warbird Series Focke Wulf FW-190 50EP
We will post a full review later this spring.
Parts we used:
Hobbyking HXT9610 Low profile metal gear retract servo
Kyosho SQS Warbird Series Focke Wulf FW-190 50EP
Snow flying with skis - Parkfun Fusion
Flying the modified Parkfun Fusion on a nice winter day. Strong 10 m/s (22 mph) winds was nothing for the gyro-stabilized plane. Skis from Hobbyking adding wheight of almost 200 grams.
Parts we used:
Parts we used:
Thursday, January 20, 2011
Review ElectronicaRC antenna tracker
INTRODUCTION
ElectronicaRC.com sells this Antenna pan/tilt assembly kit designed to work with EagleEyes, the groundstation from EagleTree Systems. It is designed to hold patch antennas (2.4Ghz: 8dBi, 13dBi and 14dBi. 1.3Ghz: 8dBi and 5.8Ghz) and has direct mounting points for L-Com 2.4Ghz 14dBi and 1.3Ghz 8dBi Antenna. ElectronicaRC.com also claims it may work with other antennas on the market.
The antenna tracker is ready for mounting to any standard photography tripod.
KIT CONTENTS
This antenna tracker came neatly packed as always from ElectronicaRC.com. I heard some parts moving around in the box, but nothing was broken.
• Plastic case w/ pre-drilled holes for EagleEyes (W: 118 mm, H: 61 mm, L: 190 mm)
• 4 pcs M3x40mm "pins"
• Aluminium rod w/ nuts to hold the pan/tilt mechanism
• 4 pcs zip tie 95mm
• Wooden plate w/ pre-drilled holes
Servos:
• TowerPro SG-5010 double ball bearing - tilt
• GWS S125 1T/2BB - pan
Aluminium profiles:
• Large, pan (Base: 252 mm, H1: 140 mm, H2: 166 mm)
• Small, tilt (Base: 227 mm, H: 32 mm)
Screws:
• 1 pc M3x16mm flat head
• 8 pcs M3x10mm flat head
• 2 pcs M3x12mm flat head
• 4 pcs M3x22mm flat head, Phillips
• 2 pcs 3x9mm self-tapping, Phillips
Nuts, washers:
• 10 pcs M3x2,1mm nuts
• 1 pc M3 nylon locknut
• 1 pc M3x5mm nut
• 22 pcs 3x7mm washers
| Plastic case, front. The machined groove is uneven and looks a bit "homemade". |
| Inside of the case. |
| Pins for servo mount, pan servo. |
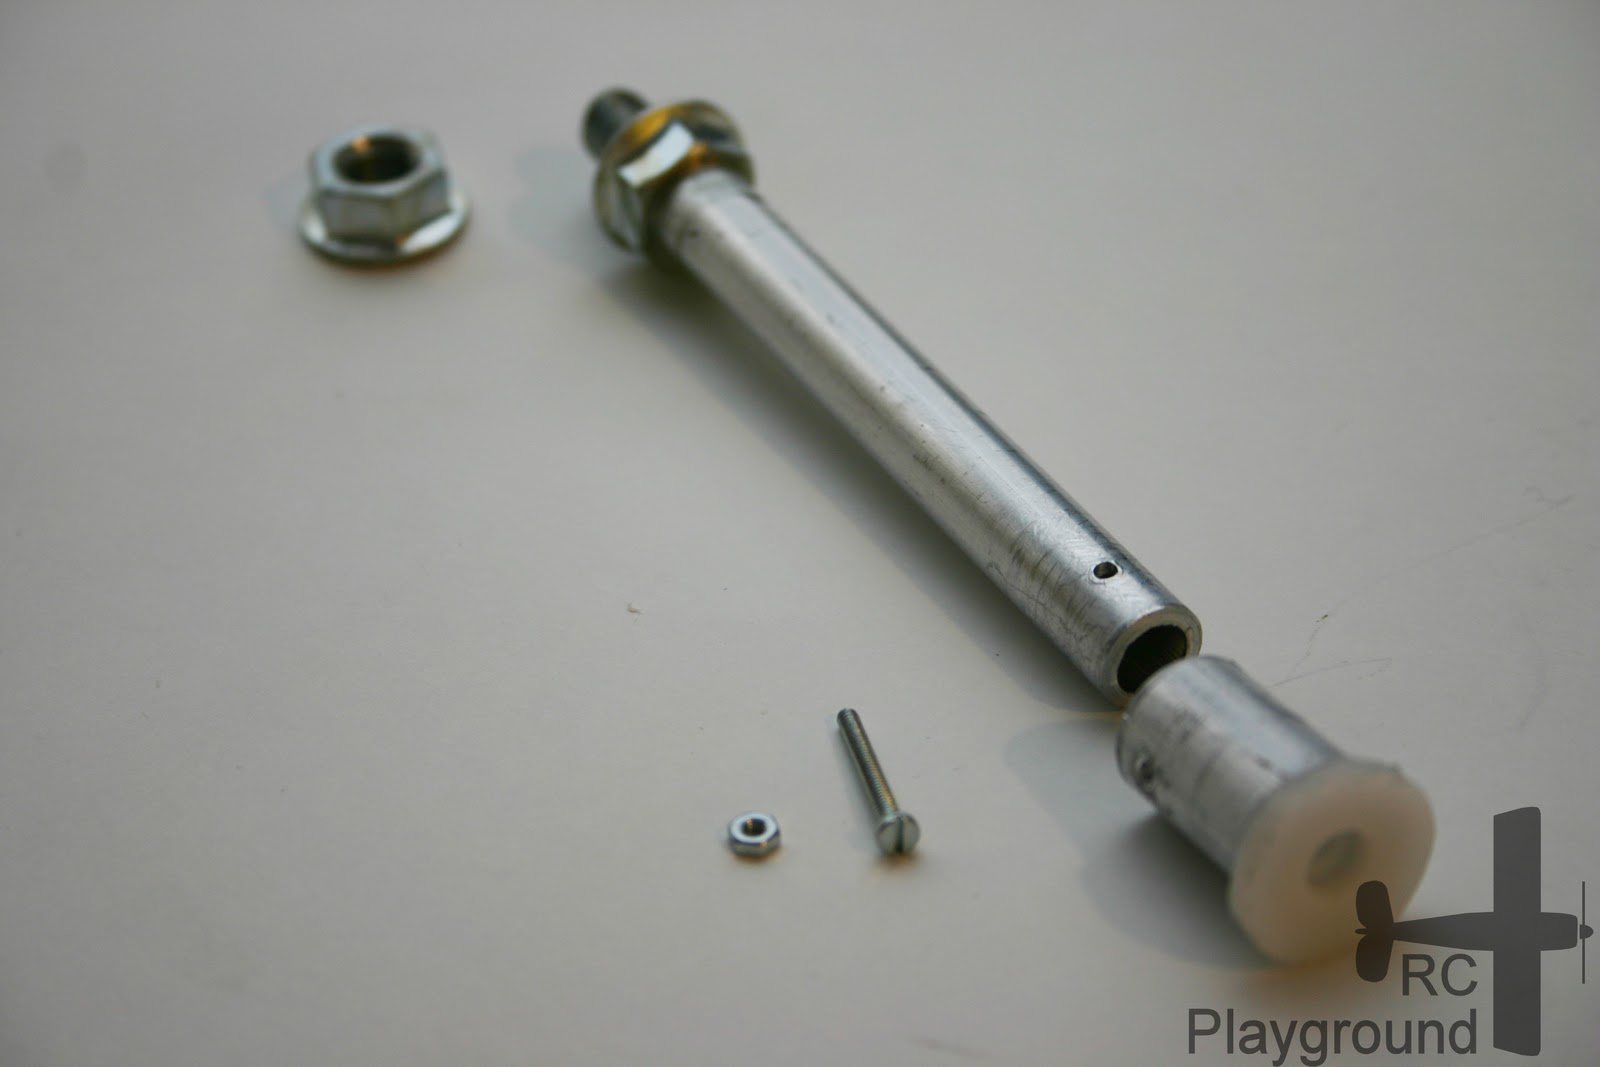
| Aluminium rod for pan mechanism. Bottom part is a servohorn glued to a thicker aluminium tube, which is possible to detach. |
| Wooden plate which is the base of the pan servo. It takes up all weight of pan/tilt mechanism including antennas and VRxs. This is the whole unit's Achilles heel or weak point. |
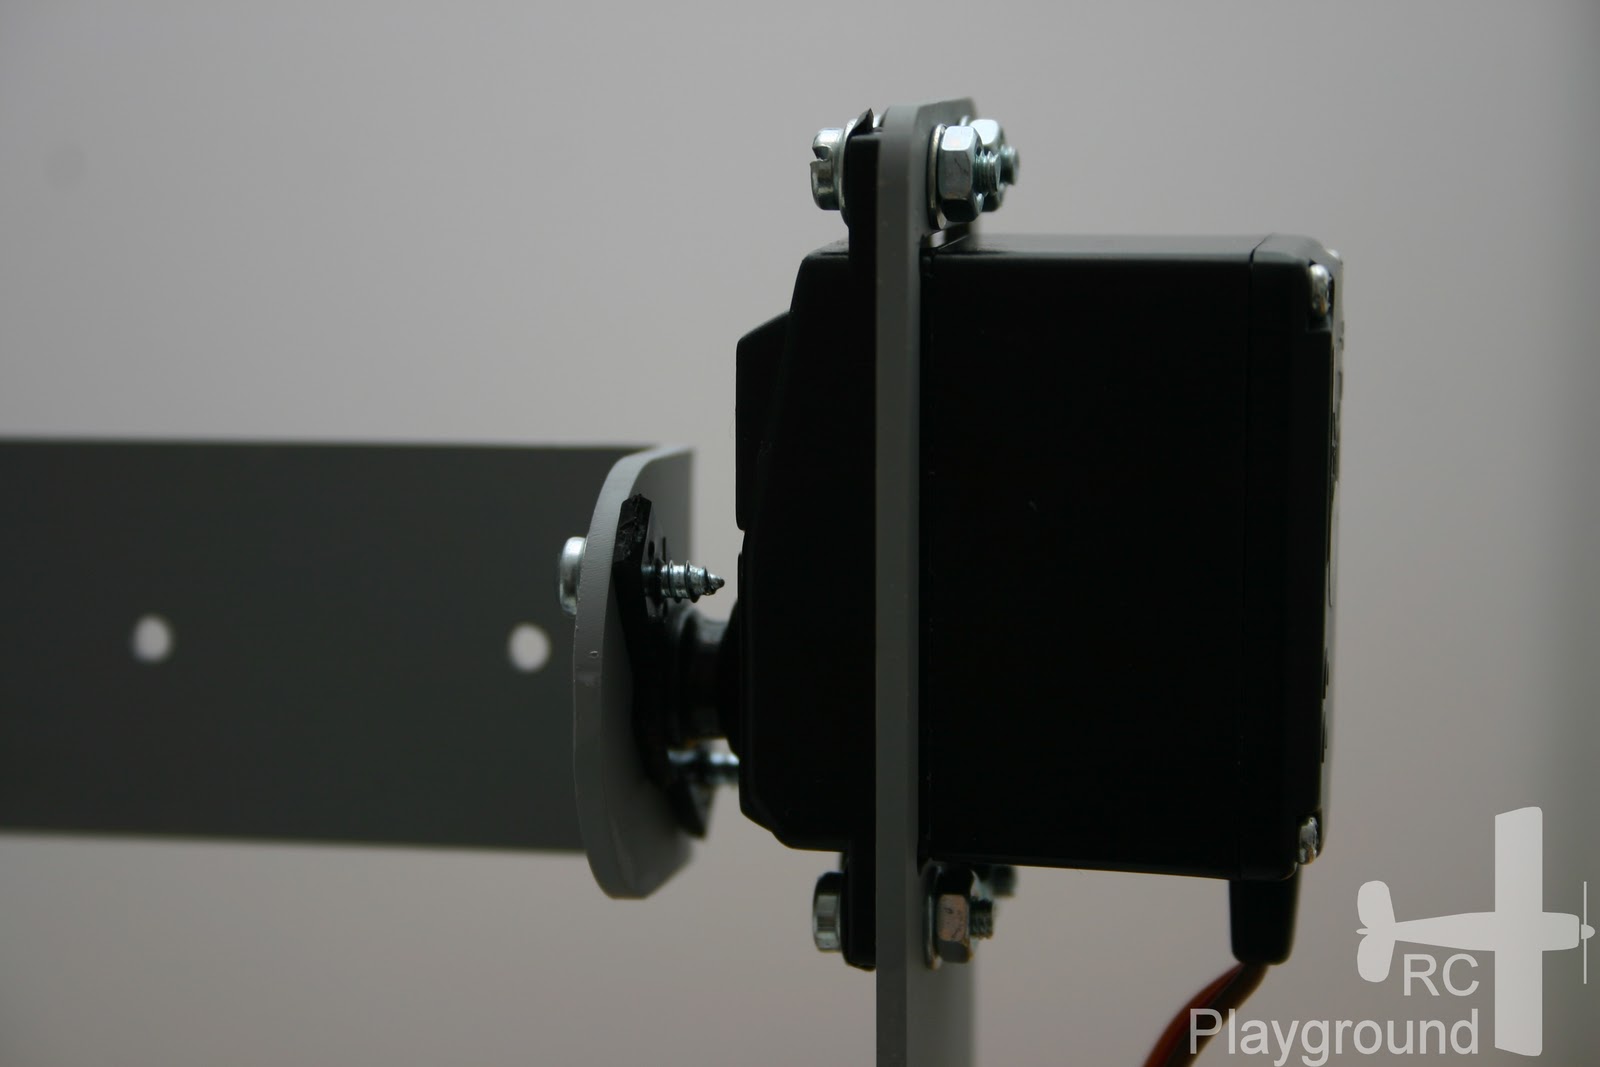
| Tilt servo, TowerPro SG-5010 double ball bearing. |
| Pan servo, GWS S125 1T/2BB. 1T = 360 degrees, i.e. it can rotate one turn. Commonly used as pan servo in the plane also. |
| Aluminium profiles. I painted my profiles light grey. |
| Flat head machine screws. |
| Screw for mounting front and back of the box together. |
| Screw for tilt mechanism. |
| Standard M3 nuts, used for fastening of the servos. |
| Long nut (left), and lock nut (right), part of the tilt mechanism. |
| Standard M3 washers. |
THE BUILD
It didn't take me longer than probably 2 hours to complete this kit. Even though there was no manual (at least I didn't have one, now you guys do...) it's not rocket science to build this antenna tracker. All parts fit together nicely and I didn't have to do any special fixing.
First, do a check that everything that's supposed to be included really is in your box. Since there is no documentation included I had to find out for myself.
Then, start with mounting the pan servo. Make sure you have the long pins/nuts (M3x40mm) turned with the pins down through the holes. Don't forget the washer before you mount the nuts. I didn't use any thread locker, but I might regret that. Main reason is I didn't have any while I did this build.
| The wooden plate should be positioned like above when looking from the underside. |
| View from the top. |
| Before mounting any servos, I used the Turnigy 760LV-HV Dual Pulse Width Selectable Servo Tester to establish that servos are working, checking end points and locating neutral/centre position. |
| Pan servo ready for mounting in the box. Notice direction of the servo. The bottom part of the rod for the pan mechanism is also mounted, with the included screw that comes with the servo. |
| Now is a good time to mount the tripod shoe (not included). Everything gets much easier when you have the box mounted to your tripod during the build. |
| Pan servo installed. |
| Tilt servo mounted on the aluminium profile. |
| Servo horn installed with two self-tapping screws. |
| And a view from the other side |
| Tilt mechanism ready for action. |
| Another view of tilt servo. |
| The other side of the tilt aluminium profile is secured with the nylon lock nut. |
| Top of the antenna tracker. |
| Another view of the top. |
| The whole antenna tracker, ready for the EagleEyes. |
| Looks nice. I'm satisfied with the grey matte colour. |
CONCLUSION
Overall I'm satisfied, but I can't help feeling a little bit cheated. It's a nice product which is easy to build but for the price of €118 / $165.20 I must say that ElectronicaRC.com should provide you with a manual, parts list and most of all more precise milling of the box. I feel like I could have done an equal good job with my Dremel.
The wooden plate which is base for the pan servo is, as said before in this review, the Achilles heel of the whole unit. Why? Because it takes up all weight of pan/tilt mechanism, antennas and VRxs. This should be thicker, have some carbon rods or be made of some type of laminate.
This kit should also include mounting equipment for the VRx since that's what it's made for. Now I'll have to come up with my own solution.
Nevertheless, this is a nice add-on to my "groundstation-to-be" and now when I'm done, I can't resist feeling a bit proud.
Monday, January 17, 2011
Review Hobbyking Kinetic 800 mini glider
INTRODUCTION
The Hobby King Kinetic 800 Mini Glider is what Hobbyking call “a truly plug and play model”. I tend to agree, since you will be airborne within 15 minutes from box opening if you are fast. You don’t need any glue and the parts snaps together with clever interlocking parts. The Kinetic is like the Mini Swift’s big brother. We just bought two of them to have some fun.
The plane has a folding 8x5 prop, a brushless motor (2226-1250kv) and a 30A ESC. The specs says you should use a 500-1000mah 11.1v (3S1P) LiPo battery. The servo leads have small labels to know where to install each of them in your receiver. If you are using a 4ch radio, there is a y-lead supplied in the box for installation of aileron servos. If you are using a radio with 4+ channels and want to do flaperons/spoilerons you need an extension cable for the throttle.
The wings are easy to attach/detach for easy transport and storage. Also, a nice feature, a radio like Hobbyking 6ch will fit in the box, so that box is a keeper.
Just as the Multiplex Merlin, the Kinetic 800 lack a traditional elevator. The entire horizontal stabilizer is used as an elevator, which according to Hobbyking, gives you more precise control.
My Kinetic 800 was broken in shipping/handling. As you can see on the image below, the fuselage is way too much to the right in that picture. The fuselage wasn't secured enough. The rudder has come loose of the vertical fin. Also, HK missed to glue the wing joiner (3rd image) on one of the wing halves. I’ve sent them a mail requesting they send a new joiner for me to glue in place myself. I’ll fix the rudder myself.
I will install the Hobby King 2.4Ghz 6Ch Tx & Rx V2 (Mode 2) radio which is proven to work really well. The receiver weighs 9 grams and is really small. It fits way back inside the fuse.
KIT CONTENTS
• Fuselage (w/ installed motor, prop, ESC and servos for elevator and rudder)
• Main wing (2 parts, each w/ installed servo for aileron)
• Elevator (2 parts)
• Hex wrench (for adjusting rods to control surfaces)
• Phillips screwdriver
• Y-cable (for connecting aileron servos if you don’t use flaperons/spoilerons)
• Decal sheet
Specs:
Wing Span: 800 mm
Length: 620 mm
Weight: 237grams (without battery and stickers)
Servos: 4 x 4,3g (included)
Motor: brushless 2226-1250kv (included)
ESC: 30A (included)
Prop: 8x5 (Included)
Battery: 11.1v 500-1000 mah 3S1p (required), not larger than 27 mm in height
Battery Compartment:
- length: 100 mm
- width: 26 mm
- height: 27 mm
Radio equipment: 4 channel (required)
Material: EPO
Wing corda: 11,5 cm
CG placement: 4 cm from leading edge (according to manual)
Stats with fully charged 1000 mAh Turnigy 11,1V battery:
Pull: 470+ grams @ 9,25A / 109 watts
ASSEMBLY
All parts fit nicely together. Apart from the shipping/handling problems mentioned above, everything looks great. The wings are easy to detach, you just use a small screwdriver to loosen the wing joiners inside the fuselage. The elevator was a bit tricky to install because of the tight fit, be careful not to apply too much pressure.
Assembly is very simple. All electronics are mounted except for the LiPo battery and receiver. First, start by assembling the horizontal stabilizer. This model has no “normal” elevator, instead it moves the whole stabilizer. The tail comes in two pieces which you just put together with a click.
The installation of the main wing is easy. Slide the wings in from each side. Use the Y-connector for aileron servos if you’re using a 4-channel radio or if you don’t want to bother with ailerons/spoilerons. If you want to place the receiver all the way back, you might need an extension for the throttle cable. The battery compartment is long, narrow and is not high enough for many
3S batteries. I bought the Turnigy 1000mAh 3S 25C Lipo Pack because I want long flight times and lots of power. If I put the receiver waaay back I can fit that battery inside the compartment. The CG is right between the servo cable and the carbon strip. Might need to add 10 grams to the tail, but I'll find out when I maiden.
RADIO
When I bought the Kinetic 800 I did so because I want a plane that is easy to transport and store, a mobile RC package essentially. The Hobby King 2.4Ghz 6Ch is a perfect choice for that kind of configuration. It’s easy to setup and program with the USB cable that is one of these “must buy” items.
I’ve put all necessary files in a zip (download link) for your convenience. I also added the configuration for my setup on the Kinetic, which has dual rates on the right switch and flaperons/spoilerons on a mix on the left switch. The left nob controls the amount of flaperon/spoileron.
First, you must use a machine running Microsoft XP or Vista, so don’t throw your old laptop I know you have laying around somewhere. Locate the “CP210xVCPInstaller.exe” in the "Windows_2K_XP_S2K3_Vista” folder. It installs the USB drivers, which can take a while on older, slower machines.
When the driver is installed you install the actual transmitter software, “t6config.exe”. If everything works out for you, then insert the USB cable in the computer. It should have a red light. Then insert the cable in the transmitter trainer input. Then start the transmitter and lastly start the T6 program from your desktop.
Click the button “open” to load the file with my settings and mixes.
FLYING
I’ll maiden the Kinetic this weekend and also upload film and photos. It's quite cold outside which is a perfect opportunity to try my new Turnigy Transmitter Glove (2,4GHz/Neckstrap Ready).
CONCLUSION
This is a really nice product that requires very little knowledge and money to get airborne. It's cheap and easy to maintain. This will be the model I will teach my 5-year old daughter to fly this spring.
Good luck and happy flying!
The Hobby King Kinetic 800 Mini Glider is what Hobbyking call “a truly plug and play model”. I tend to agree, since you will be airborne within 15 minutes from box opening if you are fast. You don’t need any glue and the parts snaps together with clever interlocking parts. The Kinetic is like the Mini Swift’s big brother. We just bought two of them to have some fun.
The plane has a folding 8x5 prop, a brushless motor (2226-1250kv) and a 30A ESC. The specs says you should use a 500-1000mah 11.1v (3S1P) LiPo battery. The servo leads have small labels to know where to install each of them in your receiver. If you are using a 4ch radio, there is a y-lead supplied in the box for installation of aileron servos. If you are using a radio with 4+ channels and want to do flaperons/spoilerons you need an extension cable for the throttle.
The wings are easy to attach/detach for easy transport and storage. Also, a nice feature, a radio like Hobbyking 6ch will fit in the box, so that box is a keeper.
Just as the Multiplex Merlin, the Kinetic 800 lack a traditional elevator. The entire horizontal stabilizer is used as an elevator, which according to Hobbyking, gives you more precise control.
| Box looks ok, no damages from shipping. |
| Decal sheet on top, plane under the sheet and radio on the side. |
| Decal sheet. No more, no less. The quality seems to be ok, but not better. They are pre-cut but ours was not perfect on some edges. |
| The box for the plane is protected by a "lid". |
| Lid open, bubble wrapping to protect the plane. They could have done a better job on this one though, read further down. |
My Kinetic 800 was broken in shipping/handling. As you can see on the image below, the fuselage is way too much to the right in that picture. The fuselage wasn't secured enough. The rudder has come loose of the vertical fin. Also, HK missed to glue the wing joiner (3rd image) on one of the wing halves. I’ve sent them a mail requesting they send a new joiner for me to glue in place myself. I’ll fix the rudder myself.
| You can see the rudder broken off the fuselage. |
| Closeup. |
| And the wing joiner that's missing. |
I will install the Hobby King 2.4Ghz 6Ch Tx & Rx V2 (Mode 2) radio which is proven to work really well. The receiver weighs 9 grams and is really small. It fits way back inside the fuse.
KIT CONTENTS
• Fuselage (w/ installed motor, prop, ESC and servos for elevator and rudder)
• Main wing (2 parts, each w/ installed servo for aileron)
• Elevator (2 parts)
• Hex wrench (for adjusting rods to control surfaces)
• Phillips screwdriver
• Y-cable (for connecting aileron servos if you don’t use flaperons/spoilerons)
• Decal sheet
Specs:
Wing Span: 800 mm
Length: 620 mm
Weight: 237grams (without battery and stickers)
Servos: 4 x 4,3g (included)
Motor: brushless 2226-1250kv (included)
ESC: 30A (included)
Prop: 8x5 (Included)
Battery: 11.1v 500-1000 mah 3S1p (required), not larger than 27 mm in height
Battery Compartment:
- length: 100 mm
- width: 26 mm
- height: 27 mm
Radio equipment: 4 channel (required)
Material: EPO
Wing corda: 11,5 cm
CG placement: 4 cm from leading edge (according to manual)
Stats with fully charged 1000 mAh Turnigy 11,1V battery:
Pull: 470+ grams @ 9,25A / 109 watts
ASSEMBLY
All parts fit nicely together. Apart from the shipping/handling problems mentioned above, everything looks great. The wings are easy to detach, you just use a small screwdriver to loosen the wing joiners inside the fuselage. The elevator was a bit tricky to install because of the tight fit, be careful not to apply too much pressure.
| Left half of the stabilizer installed. Now all that's needed is a firm push with the other half and they will fit together. |
Assembly is very simple. All electronics are mounted except for the LiPo battery and receiver. First, start by assembling the horizontal stabilizer. This model has no “normal” elevator, instead it moves the whole stabilizer. The tail comes in two pieces which you just put together with a click.
The installation of the main wing is easy. Slide the wings in from each side. Use the Y-connector for aileron servos if you’re using a 4-channel radio or if you don’t want to bother with ailerons/spoilerons. If you want to place the receiver all the way back, you might need an extension for the throttle cable. The battery compartment is long, narrow and is not high enough for many
3S batteries. I bought the Turnigy 1000mAh 3S 25C Lipo Pack because I want long flight times and lots of power. If I put the receiver waaay back I can fit that battery inside the compartment. The CG is right between the servo cable and the carbon strip. Might need to add 10 grams to the tail, but I'll find out when I maiden.
| Clean and nice. Hatch will probably not get loose by itself. Air outlet. |
| Hatch open. Narrow but ok. |
| Closeup on ESC. |
| Left main wing on. Servo cable goes into the hole and down to receiver. |
| Above the plug to the ESC you see where the main wings is secured to the fuselage. The one to the right is missing as said above. |
RADIO
When I bought the Kinetic 800 I did so because I want a plane that is easy to transport and store, a mobile RC package essentially. The Hobby King 2.4Ghz 6Ch is a perfect choice for that kind of configuration. It’s easy to setup and program with the USB cable that is one of these “must buy” items.
I’ve put all necessary files in a zip (download link) for your convenience. I also added the configuration for my setup on the Kinetic, which has dual rates on the right switch and flaperons/spoilerons on a mix on the left switch. The left nob controls the amount of flaperon/spoileron.
First, you must use a machine running Microsoft XP or Vista, so don’t throw your old laptop I know you have laying around somewhere. Locate the “CP210xVCPInstaller.exe” in the "Windows_2K_XP_S2K3_Vista” folder. It installs the USB drivers, which can take a while on older, slower machines.
When the driver is installed you install the actual transmitter software, “t6config.exe”. If everything works out for you, then insert the USB cable in the computer. It should have a red light. Then insert the cable in the transmitter trainer input. Then start the transmitter and lastly start the T6 program from your desktop.
Click the button “open” to load the file with my settings and mixes.
FLYING
I’ll maiden the Kinetic this weekend and also upload film and photos. It's quite cold outside which is a perfect opportunity to try my new Turnigy Transmitter Glove (2,4GHz/Neckstrap Ready).
CONCLUSION
This is a really nice product that requires very little knowledge and money to get airborne. It's cheap and easy to maintain. This will be the model I will teach my 5-year old daughter to fly this spring.
Good luck and happy flying!
Subscribe to:
Posts (Atom)